
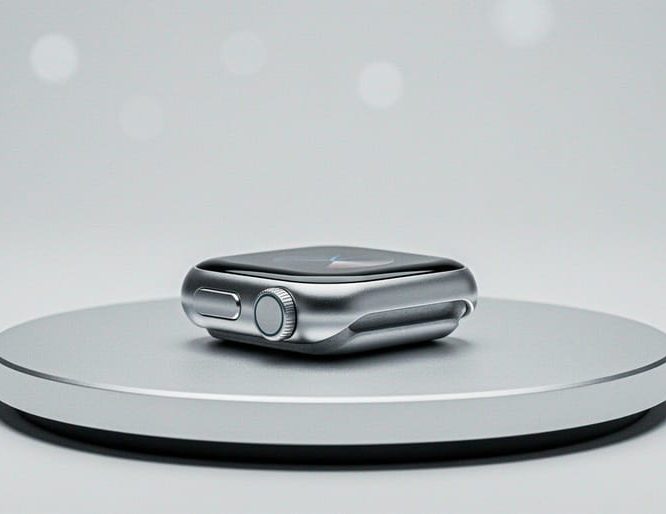
Creating professional 360-degree product photography requires a turntable (manual or motorized), a camera with intervalometer capability, consistent lighting, and post-processing software to stitch your images into an interactive viewer. The entire process takes about 30 to 45 minutes per product once you’ve mastered the setup, and the results transform flat product listings into engaging, interactive experiences that let customers explore every angle before they buy.
If you’ve been wondering how online retailers create those spin-around product views that feel almost touchable, you’re looking at cutting-edge technology that’s become surprisingly accessible. Whether you’re selling handcrafted jewelry, electronics, or artisan goods, 360 photography bridges the gap between browsing online and holding a product in your hands. Studies consistently show that interactive product images boost customer confidence and reduce return rates, because buyers know exactly what they’re getting.
The beauty of 360 product photography lies in its scalability. You can start with a DIY setup using a lazy Susan and your smartphone, or invest in a professional motorized turntable system with studio lighting for catalog-level consistency. Either way, the fundamental technique remains the same: capture a series of evenly spaced images as your product rotates through a full circle, then use specialized software to combine those frames into a smooth, interactive spin.
This guide walks you through every step, from choosing the right equipment for your budget to perfecting your lighting setup and exporting web-ready files. You’ll learn how many photos you actually need (spoiler: usually 24 to 36), how to avoid common pitfalls like inconsistent lighting or wobbly rotation, and how to verify your final viewer works flawlessly across devices.
Essential Equipment and Materials
Creating professional 360-degree product photography doesn’t require a Hollywood budget, but you do need the right tools to achieve consistent, interactive results. Whether you’re testing the waters with a DIY setup or investing in automated equipment, understanding your options helps you make smart choices that match your goals and budget.
At minimum, you’ll need equipment that captures images from every angle while maintaining absolute consistency across all frames. Here’s what belongs in your kit:
- Camera gear: DSLR or mirrorless camera with manual controls, sturdy tripod, remote shutter release or intervalometer
- Turntables and platforms: Manual lazy Susan for DIY, motorized turntable for automation, or specialized 360 photography turntable with degree markings
- Lighting setup: Two to three continuous LED lights or strobes, softboxes or diffusers for even coverage, light stands
- Backdrop materials: Seamless white or neutral paper roll, foldable backdrop stand, or sweep table for small products
- Software tools: Photo editing program (Lightroom, Photoshop), 360 stitching software, background removal tools
The budget-friendly route starts around a few hundred dollars. You can use a smartphone with a tripod mount, a basic manual turntable, and natural window light with a white poster board backdrop. Free or low-cost software handles the stitching. This approach works surprisingly well for smaller products and lets you prove the concept before scaling up.
Professional setups range from mid-tier to premium. A quality DSLR with a macro lens gives you sharp detail. Motorized turntables rotate at precise intervals and sync with your camera, eliminating human error. Continuous LED lighting panels provide consistent color temperature without the heat spikes of older bulbs. Specialized 360 software automates much of the post-production workflow, turning hours of manual work into minutes.
The sweet spot for most small businesses sits somewhere in the middle. Rent high-end equipment for initial shoots to test what features you actually use. Many studios offer customizable packages where you supply the products and they handle the technical execution, giving you professional results without the capital investment. As your product line grows, you can gradually build your own setup based on real production needs rather than guesswork.
Setting Up Your Studio Space
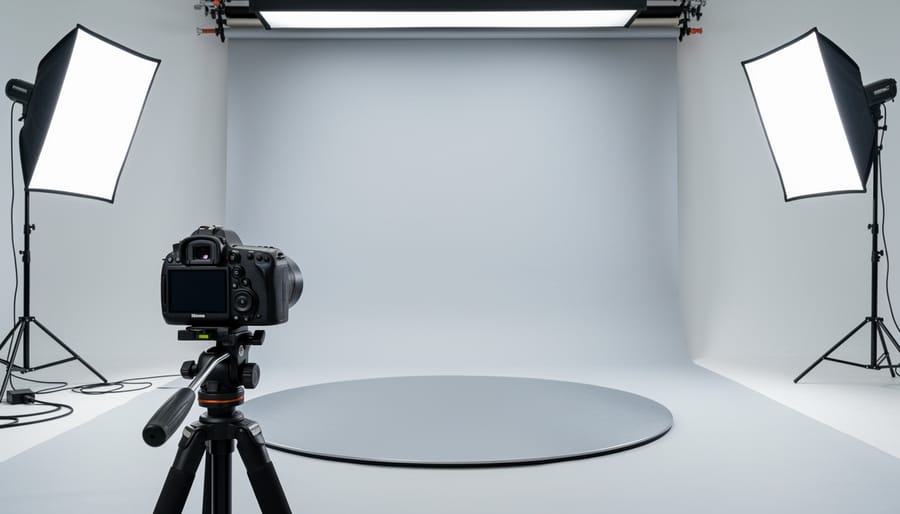
Your studio space determines whether your 360-degree product shots look professional or amateurish. Start by choosing a room or area with no windows, or black out existing windows completely, you need full control over every light source to avoid unexpected shadows or color shifts as the product rotates. Natural light changes constantly, making it impossible to maintain the consistency essential for modern capture tech workflows.
Position your turntable at the center of your shooting space, leaving enough clearance around it for your lighting stands and camera tripod. Mount your camera on a stable tripod directly in front of the turntable, ensuring it’s level and at the appropriate height for your product, typically centered on the product’s mid-height. Lock down the tripod head completely; even slight movements between frames will ruin the seamless rotation effect.
For the backdrop, use a seamless white or light gray paper that curves from the wall down behind and under the turntable. This creates an infinite background effect without visible edges or corners. Alternatively, use a professional cyclorama setup if you’re working with larger products.
Arrange two or three continuous LED lights in a triangular pattern around your turntable, positioned at equal distances and heights. This provides even, shadowless coverage as the product spins. Softboxes or diffusers on each light eliminate harsh shadows. Test your setup by rotating the turntable manually while watching for any dark spots or reflections, adjust light angles until coverage remains uniform throughout the full rotation.
Safety and Common Pitfalls to Avoid
Before you start shooting, a few simple precautions will protect your equipment, your product, and your final results. Most issues are easy to prevent once you know what to watch for.
Electrical safety matters when you’re running multiple lights for extended sessions. Continuous LED or tungsten lights generate significant heat, so keep them at a safe distance from flammable backdrops and check that your power strips can handle the combined wattage. Give your lights periodic breaks during long shoots to avoid overheating, and never leave them unattended while powered on.
Your camera gear deserves attention too. Keep drinks and liquids well away from the shooting area, and use a sturdy tripod with a secure mounting plate, a wobbly setup mid-shoot can shift your framing and ruin an entire sequence. If you’re using a motorized turntable, position cables where they won’t get caught in the rotation.
Common mistakes often come down to consistency. An inconsistent background, wrinkles in your sweep, shadows that shift as the product rotates, or visible seams, will show up glaringly in the final 360 view. Lock your white balance and exposure settings in manual mode before you begin; even small automatic adjustments between frames will create jarring color or brightness jumps when stitched together. Finally, test your turntable speed before committing to a full shoot. Uneven rotation intervals make stitching software work harder and can produce a jerky, unprofessional spin that no amount of editing will smooth out.
Step-by-Step Shooting Process
Positioning and Securing Your Product
Place your product at the center of the turntable, aligning it with any centering marks or guides. An off-center product will wobble visually as it rotates, creating a distracting effect that undermines the professional look you’re aiming for.
Check that the product sits flat and stable. If it’s lightweight or top-heavy, use museum putty, double-sided tape, or small weights hidden from the camera’s view to prevent shifting during rotation. A product that tips or slides mid-shoot forces you to restart the entire sequence.
Mark your starting position with a small piece of tape on the turntable’s edge or note the turntable’s degree marker if it has one. This reference point ensures you can verify when you’ve completed a full 360-degree rotation and captured the final frame. Without a clear start marker, you risk shooting past a full circle or stopping short, which breaks the seamless loop effect.
Take a test shot and review it on your camera’s screen. Confirm the product fills the frame appropriately, nothing extends beyond the edges, and your backdrop remains clean and even behind it.
Configuring Camera Settings for Consistency
The key to professional 360-degree product photography lies in locking your camera settings before you capture a single frame. Any variation between shots will create visible jumps, color shifts, or brightness changes in the final spin.
Start by switching your camera to full manual mode. This prevents the camera from automatically adjusting settings as it captures each frame around the product. Auto mode might compensate for slight changes in angle or reflections, creating inconsistency you’ll regret during editing.
Set your white balance manually to match your lighting. If you’re using LED panels, choose the daylight or LED preset, then lock it in with a custom white balance reading from a gray card placed near your product. This ensures the product’s colors stay true throughout the entire rotation.
Choose a low ISO (100-400) to minimize grain and noise. Higher ISOs introduce digital artifacts that become more noticeable when viewers zoom in on your 360 view.
Select an aperture between f/8 and f/16. This range provides sufficient depth of field to keep the entire product sharp, even if it shifts slightly during rotation. Too wide an aperture risks focus inconsistencies across frames.
Set your shutter speed to freeze any motion, typically 1/125th of a second or faster. This prevents blur if the turntable wobbles or if you’re manually rotating the product.
Once configured, don’t touch these settings until you’ve completed the full 360-degree capture sequence.
Capturing the Rotation Sequence
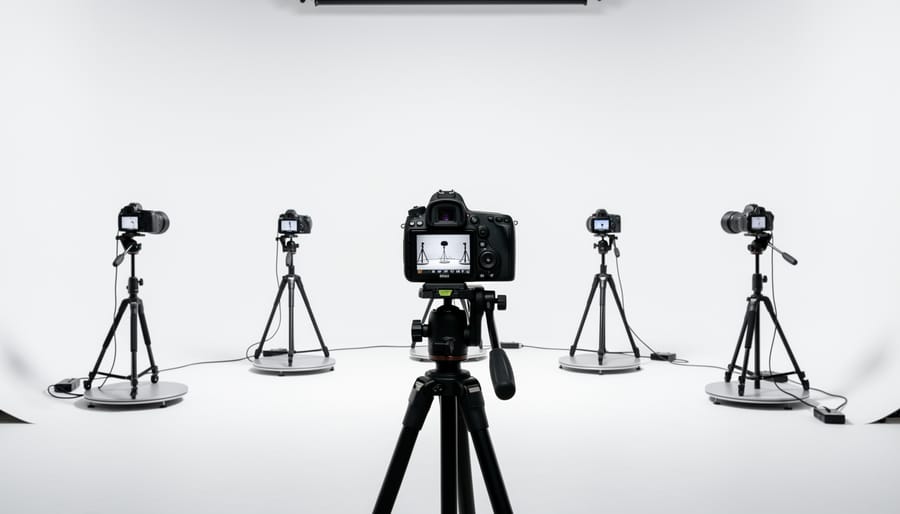
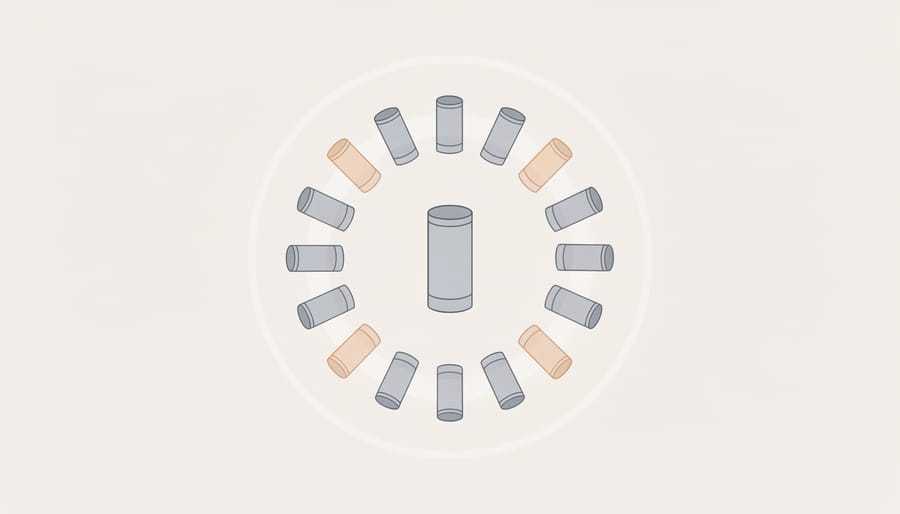
The shooting itself is straightforward once your setup is locked in. For a smooth 360-degree rotation, capture between 24 and 36 frames, 24 gives you a 15-degree interval between shots, while 36 tightens it to 10 degrees for a silkier spin. More frames mean smoother playback, but they also mean more time editing.
If you’re rotating manually, trigger each shot with a wired or wireless remote to avoid bumping the camera. Rotate the turntable by the marked intervals you measured earlier, wait a second for any vibration to settle, then fire. It’s tedious but precise. Watch your product between frames to catch any shifts or shadows creeping in.
Automated turntables speed this up dramatically. Program the number of stops, hit start, and the system rotates and shoots for you at exact intervals. This consistency is why many professionals swear by them, especially when photographing multiple products in a session. Even budget models sync with most cameras through intervalometer settings.
As you shoot, glance at the LCD screen after every few frames. Check that your product stays centered, the lighting looks identical, and nothing has wandered into the frame. Catching a problem at frame eight beats discovering it at frame thirty. Keep your shooting pace steady but not rushed, consistency matters more than speed, and one careless frame can break the entire rotation when you stitch everything together.
Completing the Full 360-Degree Cycle
As you approach the end of your rotation sequence, pay close attention to your reference markers. The final few frames should bring your product back to its original starting position, this is where your preparation pays off. Before you stop shooting, compare your current view through the camera to your very first frame. The product’s orientation, lighting, and position should match exactly.
Here’s the critical step most beginners miss: capture one extra reference frame after completing the full rotation. This overlap frame confirms your loop will be seamless when the 360 view cycles from the last image back to the first. If this frame doesn’t match your opening shot, you’ll spot alignment issues now rather than during stitching.
Check your turntable’s rotation counter if it has one, or verify your manual rotation has returned to zero. Review the last three to five images on your camera’s LCD screen, zooming in to inspect edges and details. Any wobble, drift, or lighting shift that crept in during shooting will be obvious here.
This verification step takes thirty seconds but saves hours of post-production frustration. Once you’re satisfied the cycle is complete and consistent, you’re ready to move your images into editing.
Post-Production and Stitching Your Images
Once you’ve captured all your frames, the real magic happens in post-production. Import your sequence into your preferred editing software, keeping files organized numerically so they process in order. Most photographers batch-edit the entire set in programs like Adobe Lightroom or Capture One, applying identical adjustments to every frame, this ensures perfect visual consistency as the product rotates.
Start with background cleanup. If you shot on a plain backdrop, removing or refining it creates that professional floating-product effect viewers expect. Tools like Photoshop’s background removal feature or dedicated software such as handle this efficiently across multiple images. For 2026, AI-powered background tools have eliminated most of the tedious manual masking work.
Color correction comes next. Adjust white balance, exposure, and saturation uniformly across all frames so the product appears identical in tone and brightness throughout the spin. Even minor variations between shots will create distracting flicker in the final animation. Apply your corrections to one image, then sync those settings to the entire batch.
Now for stitching, the step that transforms static images into an interactive 360 view. Specialized software like Sirv, PIXIO, or 360 Product Viewer imports your edited sequence and generates the rotational player. These platforms have become remarkably intuitive, with drag-and-drop interfaces that simplify what used to require technical expertise. Many integrate directly with e-commerce platforms, streamlining delivery.
Modern new visual workflows have cut post-production time dramatically. What once took hours of manual work now processes in minutes, making professional 360 product photography accessible to businesses without dedicated editing teams. The software handles frame alignment, generates preview thumbnails, and even optimizes file sizes for fast web loading, all automatically.
Testing and Quality Verification
Once you’ve stitched your images together, don’t rush to publish. Testing your 360-degree product view is essential, think of it as a final dress rehearsal before the product goes live.
Start by loading the 360 viewer in the environment where it’ll actually appear, whether that’s your website, an e-commerce platform, or a client presentation. Watch the full rotation several times at normal speed. Does it spin smoothly, or do you notice jerky transitions where frames don’t align? Jumps and stutters signal either inconsistent intervals during capture or stitching errors that need correction.
Pay close attention to lighting as the product rotates. Shadows shouldn’t suddenly appear or vanish, and the overall brightness should remain constant throughout the spin. Color shifts are another red flag, if your white product looks cream in some frames and blue-white in others, your white balance wasn’t locked properly during shooting.
Before you consider the project complete, verify these quality markers:
- Rotation flows without visible jumps or frame skips
- Lighting remains even with no sudden shadows or brightness changes
- Focus stays sharp across all angles of the product
- Background appears uniform without spots, seams, or color variations
- File size loads quickly without compromising image quality
- Viewer functions correctly on both desktop and mobile devices
Test the load speed on an actual internet connection, not just your local machine. If the 360 view takes more than three seconds to become interactive, consider compressing the images further without sacrificing noticeable quality. Check it on a phone, too, mobile users should experience the same smooth interaction as desktop visitors. Catching these issues now saves you from client complaints or poor user engagement later.
Frequently Asked Questions
How many frames do I need for smooth 360-degree rotation?
Most professional results use 24 to 36 frames for a full rotation. Smaller products with simple shapes can work with 24 frames, while larger or more detailed items benefit from 36 frames to ensure smooth, professional-looking movement without visible jumps.
What products work best for 360 photography?
Products with consistent shapes and interesting details showcase best in 360 views, think shoes, electronics, jewelry, furniture, and packaged goods. Items with reflective surfaces or extreme size variations require extra lighting consideration but still deliver excellent results with proper setup.
How much should I budget for equipment to get started?
Basic DIY setups start around $200-300 for a manual turntable, lighting kit, and backdrop, using a smartphone or existing camera. Mid-range automated turntables with motorized rotation run $500-1,000, while professional rigs with specialized software can exceed $3,000 for high-volume commercial work.
How do I add 360 views to my e-commerce site?
Most modern platforms like Shopify, WooCommerce, and BigCommerce support 360-degree product viewers through built-in features or plugins. After stitching your images, you’ll upload the final interactive file or image sequence, then embed the viewer code where your product photos normally appear, it’s become a straightforward technology upgrade for most online stores.
The learning curve flattens quickly once you complete your first product. Start with one representative item from your catalog to master the workflow, then scale up production as you gain confidence. Many business owners find the initial time investment pays dividends through reduced product returns and increased customer engagement, while others choose to partner with specialized studios that can deliver consistent results across entire product lines without the equipment overhead.
Next Steps: Implementing 360 Photography in Your Workflow
Now that you’ve mastered the technical process, it’s time to put 360-degree product photography to work in your business. Start with your hero product, the item that drives the most conversions or generates the most questions from customers. Shoot it, stitch it, and embed the interactive view on its product page. Monitor how visitors engage with it compared to static images. This single test case will teach you more than theory ever could and help you refine your workflow before scaling up.
For e-commerce, 360 views shine brightest on product detail pages where customers are making purchase decisions. They reduce return rates by letting shoppers examine items from every angle, answering questions before they’re asked. Social media platforms increasingly support interactive content, Instagram carousels can showcase rotation frames, while Facebook and Pinterest allow embedded 360 viewers that stop the scroll. Presentations and trade show displays gain immediate impact when prospects can spin products on tablets or screens.
As you expand, batch similar products together. Shoot all your handbags in one session, all your electronics in another. Keep settings consistent within each batch to speed up post-production. If you’re managing dozens of SKUs monthly, that’s when professional services make financial sense. Our capture technology and customizable packages handle volume efficiently, freeing you to focus on marketing strategy rather than technical execution.
The DIY route works beautifully for small catalogs or when you need complete creative control. Professional services suit businesses launching seasonal collections, managing large inventories, or lacking studio space and equipment. Many clients blend both approaches, handling everyday products in-house while outsourcing hero launches and complex shoots. Choose what fits your timeline, budget, and quality standards, knowing you can always adjust as your needs evolve.